Training Management
GM STC Portal Site (www.gmstc.com)
The GM STC portal site provides an overview of the GM STC program. Here, users can find information on the curriculum, training locations, and other details that impact service technical training. This site also provides information about other related programs, as well as the latest news and information regarding GM STC. Please visit this publicly accessible site at www.gmstc.com for more information.
First Responder Guides, Rescue Sheets, and Quick Reference Sheets
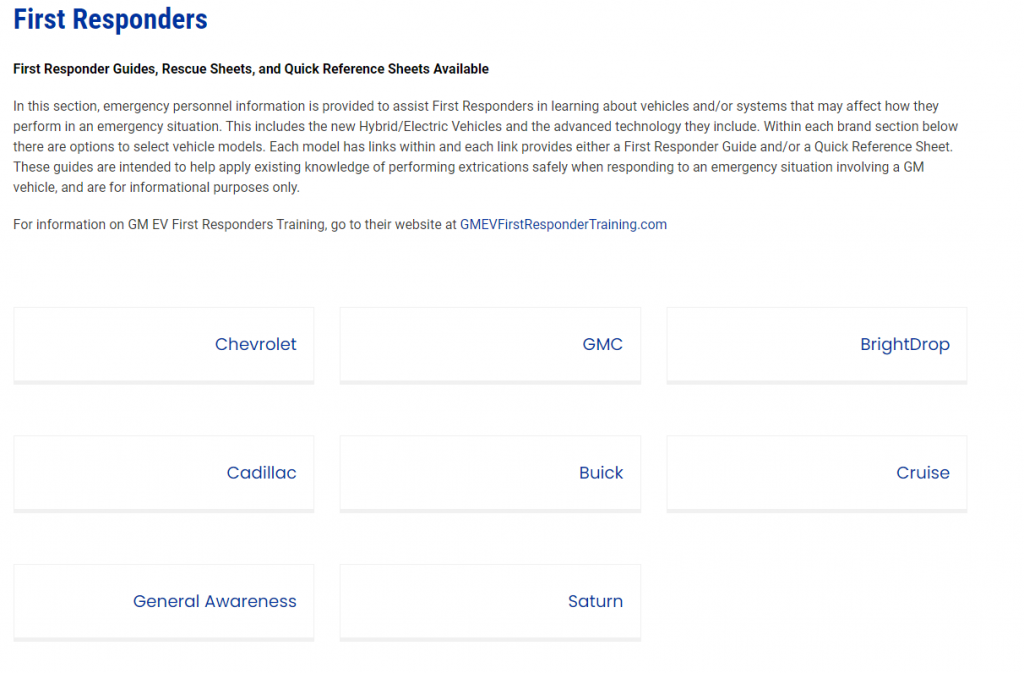
As an auto industry technology leader, the GM vehicles being developed and driven on our roads necessitate information sharing with the first responder community: firefighters, police officers, and Emergency Medical Technicians (EMTs). Technology affects vehicle components such as supplemental restraints and the materials used to build vehicles.
While some systems and components are common to traditional GM vehicles, there are now Hybrid/Electric Vehicles systems and components that differ and may affect how a rescue procedure is performed.
GM STC develops First Responder Guides (FRG), Rescue Sheets (RS), and Quick Reference Sheets (QRS) for the new technology vehicles and posts them to www.gmstc.com.
An FRG offers information on vehicle systems and components; both RS and QRS provide the “on-scene” information that first responders need. All of these items feature high quality graphics to support the information.
The FRG provides an overview on how the advance technology vehicle operates and how to identify the vehicle from conventional vehicles, in addition to identifying key hybrid components and how to safely disable the high voltage system. The “No Cut Zones” are provided to ensure the occupant and First Responder are safe during extrication procedures. RS and QRS provide vehicle identification, hybrid components and how to disable the electrical/fuel cell systems.
Additionally, GM STC provides First Responders video training on its website, gmstc.com. Navigate to the First Responders page and scroll down to see the login option. Answer the short survey and you will gain access to a series of training videos for First Responders. Return to the page at any time and use the same login you created and you progress will be saved.
Note: Guides can be downloaded from www.gmstc.com > First Responders in PDF format onto desktops and mobile devices or printed and saved in vehicles. They can also be accessed using a QR code reader on a smart device (see photo).
Center of Learning Website (www.centerlearning.com)
The Center of Learning website was implemented to respond to the GM Dealer Council’s requests that dealers have greater ownership of dealership employee training. This website enables dealers to track and organize their dealership employee training and to stay current on their training requirements and needs. It enables users to access a variety of training information at their convenience, providing details on items such as course descriptions, schedules, enrollments, training histories, resource management, and reporting.
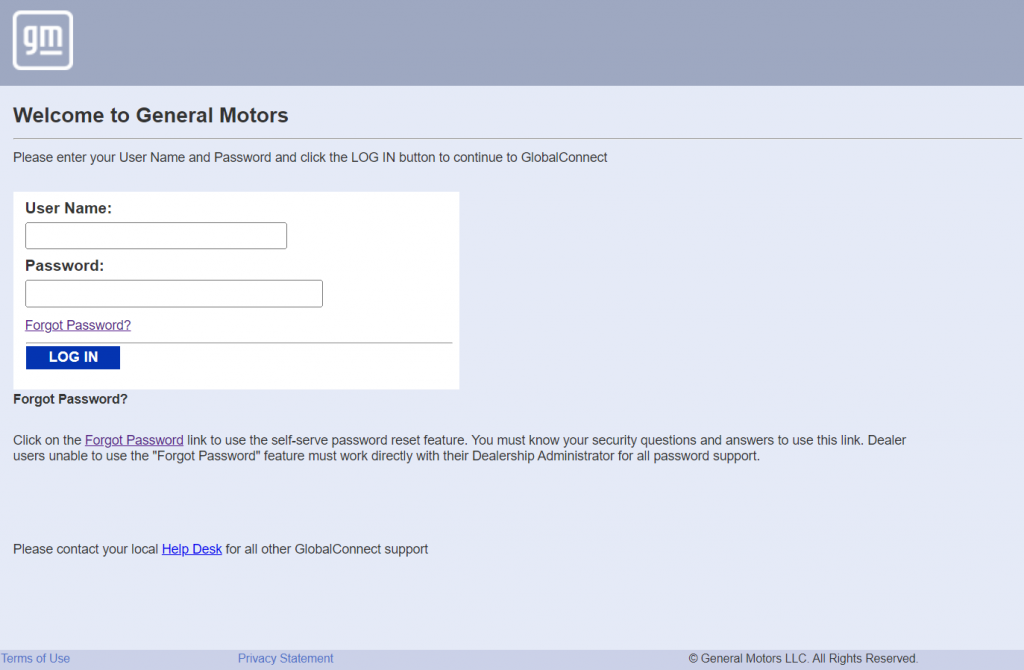
The Center of Learning website is now accessible via GM GlobalConnect (www.gmglobalconnect.com) using Single Sign-On (SSO) technology. Once logged into GlobalConnect, simply click on the Center of Learning link to reach the home page. Be sure to use your own GM GlobalConnect ID to ensure you receive credit for any web classes completed.

The website displays your specific training records and requirements. Please contact your dealership’s Partner Security Coordinator if you have questions about your access levels within GlobalConnect.
To ensure a pleasant experience when using the Center of Learning website, be sure to check out the available job aids under Help/Support link located at the top of the page.
The Importance of Email
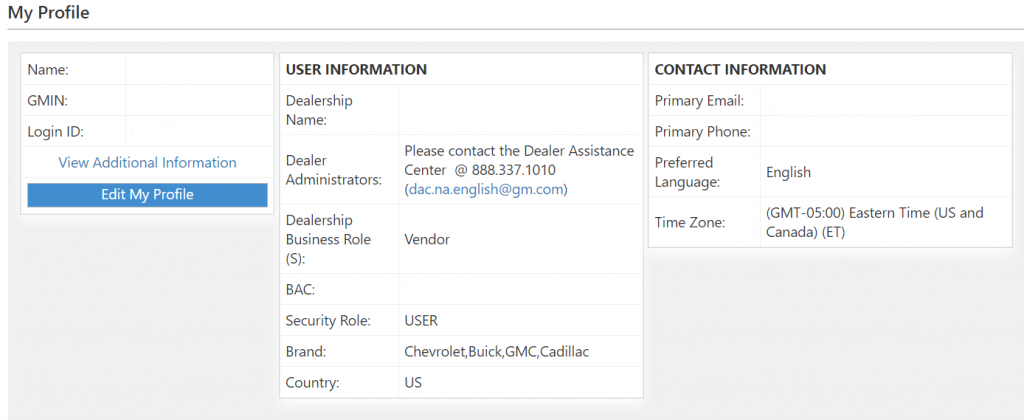
There are many Center of Learning website features that rely on technicians and service managers having accurate email addresses in GM GlobalConnect. Accordingly, technicians and service managers must fill out the My Profile page complete with a Primary Email (and/or Secondary Email) to receive important notifications from www.centerlearning.com.
Center of Learning Functionality and Features
The Center of Learning website is updated periodically based on feedback from the dealer council, GM management, and other stakeholders. Functionality and features are designed to make managing training needs even easier.
Courses are grouped by Bronze, Silver, and Gold certification areas
The GM STS Report divides courses and technician certification into three levels: Bronze, Silver, and Gold.
- Bronze Certification is achieved when a technician reaches 100% in the Fundamentals category.
- Silver Certification is achieved when a technician is Bronze Certified and has completed all in-dealer training (for example, Web Based Training, Video On Demand, online instructor-led) in any given STS area, such as Engine Repair.
- Gold Certification is achieved when a technician is Silver and ASE-certified and has completed all Hands-On training in any given STS area.
The following STS areas have Silver and Gold Certification levels:
- Emerging Issues
- Engine Performance
- Diesel Engine Performance
- Engine Repair
- Electrical/Electronics
- Manual Drivetrain & Axle
- Automatic Transmission/Transaxle
- Brakes
- Steering & Suspension
- HVAC
- Mechanical/Electrical Body Repair
- EV Expert
- EV Master
- Medium Duty
Profile Creation
When a Global Connect profile is created, the Center of Learning creates a corresponding profile overnight, automatically. When creating a Global Connect profile, make sure to select the correct role so that the Center of Learning classifies the corresponding profile correctly.
When a Service Manager hires a new Service Technician and creates a Global Connect profile for them, they should set their role as Service Technician. Then, overnight, the Center of Learning will create their corresponding Center of Learning profile and will automatically profile them as a “Technician Apprentice.” This prevents the new hire from negatively effecting the dealers STS score. This new hire will be assigned the Technician Apprentice learning path, which does not contribute to STS, but allows them to work towards 100% in Fundamentals without affecting the dealers STS.
Once the new hire has completed the Technician Apprentice learning path, the dealer can make the decision to leave them in that role ( if they are still an apprentice), change their Person Type to “Maintenance Inspection Technician” (if that is the role they have at the dealer), or change their Person Type to “Service Technician” so they begin contributing to STS. Moving them to the Service Technician role after they complete their Technician Apprentice learning path will not negatively affect the dealers STS.
For more details refer to the GM Global Connect and Center of Learning Profiles section below.
Learning paths to support Bronze, Silver, and Gold certification areas
Upon logging in, service technicians’ learning paths displays the Bronze, Silver, and Gold certification status. Courses on the STS learning paths are divided into Bronze, Silver, and Gold certification areas. Learning paths that don’t have a Bronze, Silver, or Gold certification level – such as Body Structural Repair – will remain unchanged and will continue to list all courses in a single STS group.
Bronze, Silver, and Gold certificates are available for technicians to download and print from the LMS.
Learning Path Profiling
How to Profile a Participant in a Developmental Learning Path
There are two ways to complete this process:
- Click on Learning Path across the top of the page and then click ‘View a Participant’s Learning Path’ in the drop down menu.
Or click on Profile and then Profile Manager - Search for the participant.
- Once you’ve located the participant you need to click the View Learning Path link.
- After clicking View Learning Path link that says you need to click the Add/Remove Learning Path link.
- Note: Learners profiled to a developmental Learning Path will not be included in reporting.
- By checking or un-checking boxes and clicking Submit, you can select or remove a developmental Learning Path. Scroll down to the bottom and click Update My Path.
How to Self-Select a Learning Path
- Click your learning path on the My Training Status Tab.
- Click on ‘Add/Remove Learning paths.’
- By checking or un-checking boxes and clicking Submit, you can select or remove a developmental Learning Path.
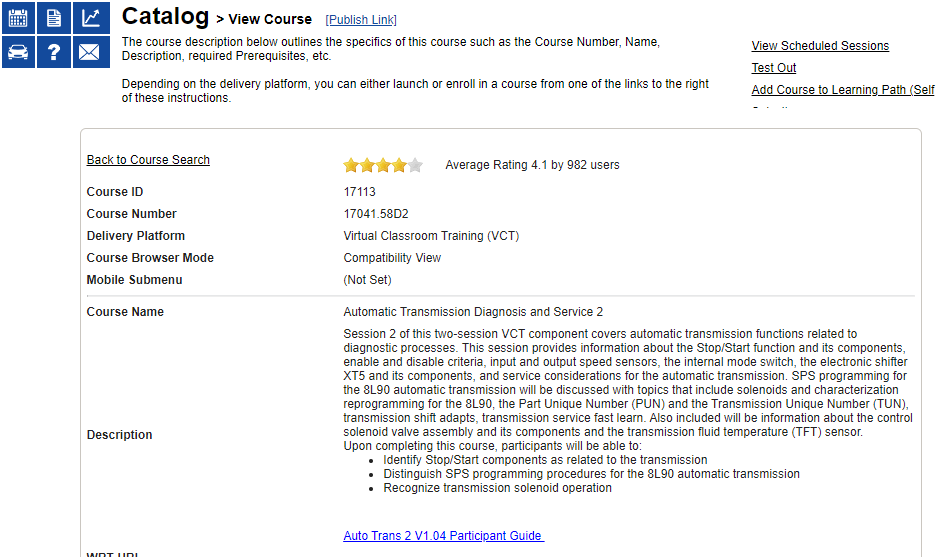
View Course and Scheduled Sessions Pages
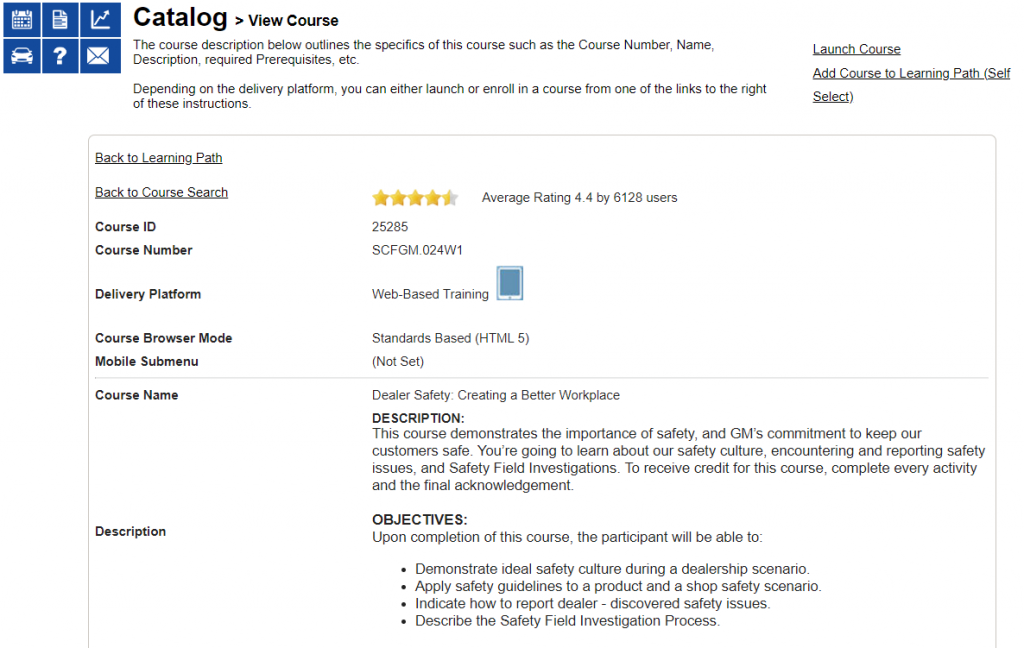
The following course information is viewable on the View Course Page:
- Course description
- Language(s)
- Prerequisites
- Equivalencies
- Expiration Period
- Education Unit
The following course information is viewable on the Scheduled Sessions Page:
- Delivery method and class duration
- Start and End Dates
Launching and Enrolling in Courses
For web-based courses and video courses, the View Course page has a Launch course link in the upper right-hand corner that will bring you to the Course Launch page. From there, select the course name link and the course will launch in a new window.
For for scheduled event training (like VCTs and ILTs), the View Course page has View Scheduled Sessions in the upper right-hand corner that will bring you to the Schedule page for that course. On this page you will see all the date and times for each of the schedule sessions, how many seats are remaining for each, and the location (if applicable). Select the Enroll link for the session you wish to enroll in, if there are seats available. Otherwise select the Waitlist link to put yourself on the waitlist for that course at that location (if applicable).
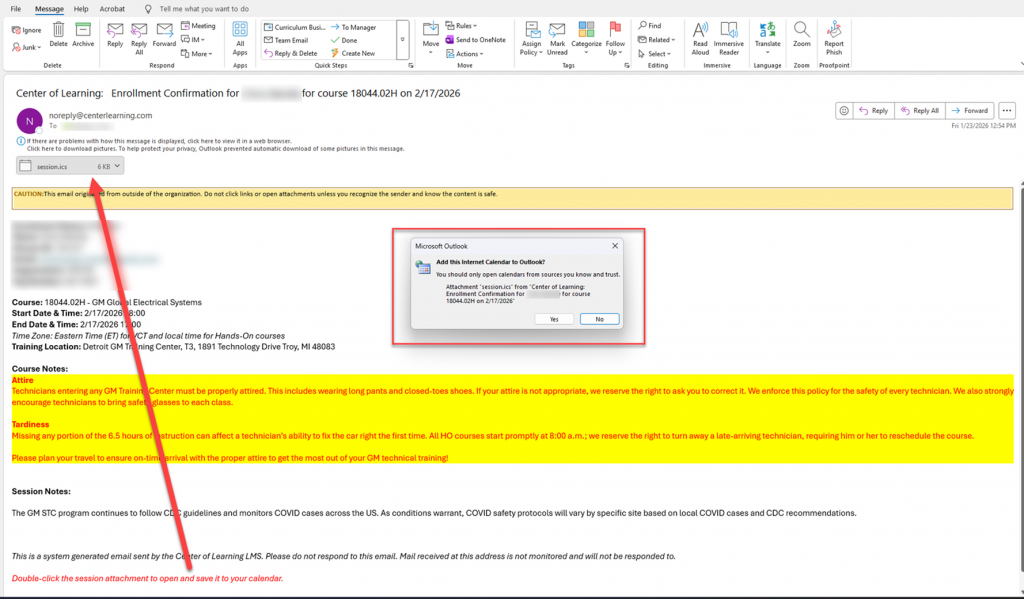
Course Enrollment Notifications
When you enroll in a scheduled event course, you will be sent a notification email with details about the course. Additionally, within that enrollment notification email is an .ics file attachment that allows you to save the class to the digital calendar of your choice. Just double-click the attachment and agree to add it to your calendar. Once added, you can even schedule a reminder in the new event on your calendar so you ensure you stay on top of your enrollments.
Text message registration notifications and reminders
Participants have the ability to enable course registrations and enrollment reminders to be sent to their mobile phones via a text message. This function can be enabled from the participant’s profile page in the Center of Learning.
Managing Course Enrollments as a Manager
Managers are able to enroll learners in course sessions to complete training on their learning paths. If for some reason they cannot attend a course, managers are also able to cancel their course session or swap the participant enrolled in the course.
There are two ways to enroll learners in a course session depending on whether or not you know what course you want them enrolled in. Once enrolled in a course, you have the option to cancel their enrollment or swap the participant attending the course. Cancellation policies apply.
How to Enroll a Participant in a Course – Course Name Known
- Click Enrollment and then select Enroll a Participant in a Course Session.
- Type in the Person ID for the participant you want to enroll. Select the course you want to enroll them in from the drop-down menu and then click Submit.
- Note: Only courses with scheduled sessions will appear in the drop-down menu.
- A list of all available sessions of the selected course (including start and end dates, location and seats available) will show. Click the radio button for the desired session and click Submit.
- Note: If your learner has prerequisites that need to be completed to attend the course, you will see a list of courses they must take before you can register them for a session. You will not be able to enroll them in the selected course.
- A confirmation message will be displayed along with the session details.
How to Enroll a Participant in a Course – Course Name Not Known
- Click the Schedule icon on the Center of Learning homepage.
- You can search for scheduled courses by Course Number, Course Name, Training Location or Seats Available. Type in the information then update your date range as desired and click Submit.
- A list of available course session(s) will show. Click Participant to start the enrollment process for your learner.
- Note: Click View Details to review the course information or click Self if you’d like to enroll yourself in the course instead of your learner.
- The Participant Enrollment screen will open with the course listed. Type in the Person ID for the participant you want to enroll and then click Submit.
- A list of all available sessions of the selected course (including start and end dates, location and seats available) will show. Click the radio button for the desired session and click Submit.
- Note: If your learner has prerequisites that need to be completed to attend the course, you
will see a list of courses they must take before you can register them for a session. You will
not be able to enroll them in the selected course.
- Note: If your learner has prerequisites that need to be completed to attend the course, you
- A confirmation message will be displayed along with the session details.
How to Cancel a Participant’s Course Enrollment
- Click Enrollment from the Center of Learning homepage menu and then select View Participant Schedules.
- You can search for participants using the drop-down menu. Type in the participant’s
information and then click Submit. - Your participant or a list of participants will show based on your search criteria. Click View Schedule for the participant you’re canceling an enrollment for.
- A screen will open showing your Participant’s Schedule. Click Cancel.
- Note: You can narrow the list of courses by selecting a date range and then clicking Submit.
Hands-on courses can be cancelled up to 48 hours prior to the class start. VCT courses can be cancelled up to 48 hours prior to the class start. If you need to cancel a VCT between 1 and 48 hours of the course start, contact the Help Desk.
- Note: You can narrow the list of courses by selecting a date range and then clicking Submit.
- A screen will open asking if you are sure you want to cancel the course. Click Yes to complete the cancellation.
- Note: If you no longer wish to cancel the course, click No to stop the cancellation.
- A confirmation screen will show the enrollment was cancelled successfully.
How to Approve Pending Enrollments
Managers can view, approve, and cancel pending enrollments for their learners. To do this:
- Click on the Enrollment at the top of the main menu, and then click on View/Approve Pending Enrollments.
- Locate your desired learner, and then click on View.
- Now you can approve or cancel the enrollment for this learner on the specified date.
- Note: Pending Enrollments are automatically canceled after the session date has passed.
How Enroll Multiple Participants using Batch Enrollment
Managers can enroll more than one team member in a class through Center of Learning batch enrollment. The Batch Enrollment feature allows you to enroll more than one employee into the same
course session at the same time. To use this feature:
- From the Center of Learning homepage, click Enrollment and then select Batch Enrollment.
- Select the Delivery Type and Course from the drop-downs and click Submit.
- Select the desired session and click Submit.
- When your dealership information appears, click Submit.
- All active employees will be listed with their Person Type identified. Check the Select box next to each of the participants you wish to enroll for the selected session and click Submit.
- An enrollment confirmation page will appear with an enrollment status next to each
individual that was selected for enrollment.
Reports
Managers have access to reports in the Center of Learning to help assist with managing their technicians’ completions and keeping them on track with their learning paths. The Center of Learning has many reports for Service Managers to help track technician training. To access reports select the Reports button on the home page of the Center of Learning.

A list of reports along with their description will appear. To view a report, click on the corresponding link and fill in the needed information to search for your desired data.
(GM) Service Training Standards (STS) Report
The (GM) Service Training Standards (STS) Report is an annual report that is a crucial tool in helping to plan your technicians’ training.
Within the report, you will see each of the service areas listed out along with a progress bar chart indicating your dealership’s current and predicted STS.

The green bars show your current STS in that service area, whereas the blue bar shows your predictive STS. Predictive STS is calculated using the drop down selection on this page. Using the date selected, it looks for all the Virtual Classroom Training (VCT) and Instructor-Led Training (ILT) events that your
technicians have scheduled and any Web Based Training (WBT) or Video On-Demand (VOD) courses that your technicians have started but not yet finished. It then calculates STS once those are completed. The gray bars represent the percent of required courses that your technicians have not yet enrolled in or started. This way Service Managers can see how much of their training they still need to plan out using the Service Training Planner.
Selecting a specific area on the STS report will allow you to dive even further into what courses need to be taken by specific technicians. The new chart that appears lists all the required courses for that particular path, and shows which have been completed (‘C’) by the assigned technicians. For credits with expirations, such as ASE Certifications, the expiration date will be shown. This notice gives you time to schedule a technician’s reaccreditation before the expiration impacts STS. This detailed view also provides a predictive STS for each individual technician for that particular service area, so you can see what training they still have to plan for their technicians on an individual level.

The STS Report can even be exported to Excel. From the reports main page, select the “Report to Excel Version” link in the upper right-hand corner. This will convert the entire STS report to an Excel document which will then download onto your computer. Once downloaded, the Excel document includes not only the main STS report from the front page, but it also includes each of the service area deep dive pages. This is an excellent tool to use when planning out each of your technicians’ training for the year.
Another useful report found on the COL’s “Reports” page is the Dealer Training Summary. This report shows all of your technicians’ training completions within a certain date range. The search can even be narrowed down to specific course numbers or titles. This is incredibly helpful if you are trying to see what courses your technicians have completed since the last time you checked the reports
The Service Training Planner
On the homepage of the Center of Learning, there is a Service Training Planner button that appears directly next to the Path to 100% STS button. If you see an exclamation mark in the upper right-hand corner of the button that means there are updates that need to be made to your plan.

When you select this button, the Center of Learning generates a report that is specifically tailored to your dealer’s training needs. It first brings you to a page showing all of the dealers you are assigned to as the manager. This page also indicates if your dealership needs to have more technicians assigned to certain learning paths.

From here, select the “View” link in the Action column of the dealership for which you wish to view the report. The report will bring you to an easy to understand page that breaks down all your dealership’s training needs. This report will display every service area and will indicate your dealership’s total STS percentage for it, along with the remaining number of technicians that need to be trained to reach 100%.
If you select the “Edit” link, you will be brought to a page that allows you to indicate what percentage you want your Training Planner to calculate to for each service area. Setting a percentage higher than 100% indicates that you want to train more technicians than what is required by STS in that service area, also known as training for depth. Depth training can help dealerships develop a versatile group of highly trained and skilled technicians.
Whether you selected the “View” link or submitted new percentages by using the “Edit” link, the following page will break down exactly what is needed in each service area.

Click on the “+” sign to expand each area to dive deeper and obtain more information on an
individual technician level. The expanded view will show technicians who have not yet met 100%
STS in that category.
- Technicians are listed in order of STS % complete, highest to lowest
- In the STS/Depth Training column, you can select your objective for each technician.
- Select “STS/Gold” next to a technician if you want them to focus on obtaining 100% for that service area, helping to meet your dealership’s minimum number of trained technicians for that category
- Select “Gold/Depth” if you would like to train that technician in that service area for depth. Training for depth means your dealer has already, or will, meet the minimum number of trained technicians in that service area, but you wish to train more technicians beyond that in that service area.
- Select “Silver” if your desire is to have the technician complete all the in-dealership training in that area, gaining the minimum skills required to perform that type of work.
- Each technician will show the total training hours required to obtain 100% in that service area. To determine which courses make up those hours, click on the technician to view their “Path to 100%” report.
- Important: Technicians cannot be certified in any area unless they complete the Fundamentals learning path first.

Course Completion Report
The Course Completion Report shows a completion summary and detail information by specific
course. Managers can utilize the Course Completion Report to review which learners at their dealership
have completed a specific course.
To access this report:
- Click on Reports from the Center of Learning home screen.
- Click the Course Completion Report link.
- Select the Delivery Type from the drop-down menu.
- Select the Course Name from the drop-down menu and then click the Submit button.
- Verify your dealership location information is correct then select the date range you
would like to review and click the Submit button.
Dealer Enrollment Summary
The Dealer Enrollment Summary shows the enrollment status of all training events by student and course. Managers can utilize the Dealer Enrollment Summary to review which learners are enrolled in specific courses based on a given date range.
To access this report:
- Click on Reports from the Center of Learning home screen.
- Click the Dealer Enrollment Summary link.
- You can search by BAC, Org Number, Dealer Name, First Name, Last Name or Course
Number. Type in your information, then update your date range as desired and click Submit. - This will show the status of all training events within a dealership (per student, per course.)
- Click on Export to Excel to download a copy to your device.
View Training Records
Managers and service technicians can view current and historical progress in the Center of Learning. To do this, click on Training Records in the top menu bar, and use the drop down menu to select ‘View Participant Training Records’ or ‘View Your Training Records’ depending on your role. If you are a manager, use ‘View Participant Training Records’ and enter the user’s information and click Submit. Once the user’s name appears click ‘View Training Records’ to review their progress. If you are a service technician use ‘View Your Training Records’ to retrieve your own records.
From your training records page you can select the Certificates link in the upper right-hand corner to to see a list of certificates that you can view, save, and print.
You can also view your entire transcript history by selecting the ‘View/Print Entire Transcript History’ link on your Training Records page.

The time it takes for course completions to appear in the learner’s Training Records varies by delivery type.
- Web-Based Training: Within a few minutes of completion, but sometimes up to 24 hours
- VCT & V-ILT: Within 24 hours
- Hands-On and P-ILT: Within 7-10 days upon completion of the course
Dealer Email Address
To manage your dealer email address on the Center of Learning, follow the steps below:
- Click on Admin Tools on the Center of Learning homepage menu and then select Dealers followed by Dealer Manager.
- Search for your dealership by any of the criteria listed.
- Once you’ve located the dealership, click Edit.
- The screen will open on the Location tab. Click Next or Contact to locate the Dealer Email Address field.
- Verify the email address(es) is correct and update as needed. Additional email addresses can be added in the Sales Email Address, Service Email Address and Parts Email Address by placing a semi-colon at the end of each address.
- Note: Clicking “Reset” will remove all of your edited content, erasing your entries.
Path to 100% STS Button
The Path to 100% STS button to the Dealer and Technician Learning Paths on the LMS home page improves the ease of navigating within the LMS and provides convenient access for enrolling and measuring progress toward achieving 100% STS.
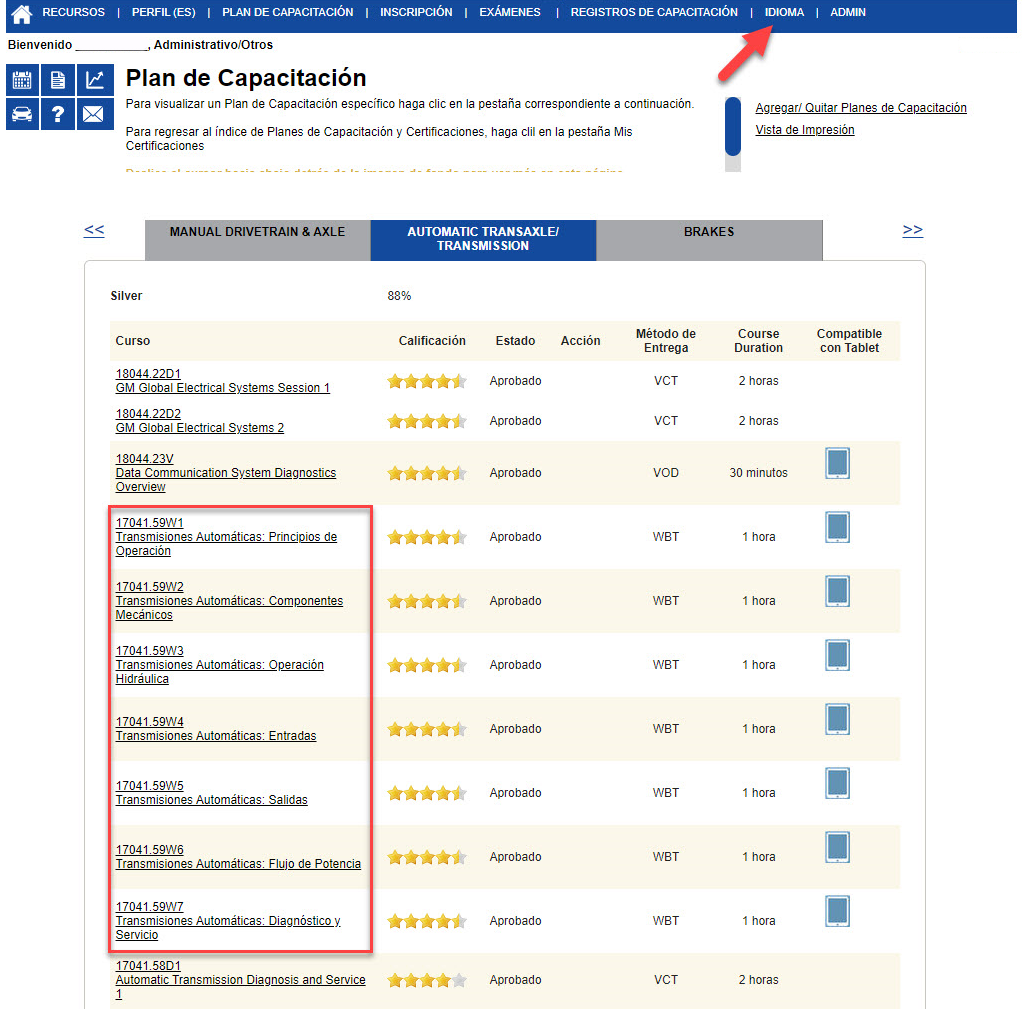
Spanish Language Option
Many of GM STC’s WBT courses are available in Spanish. For those technicians that would prefer to take their WBT courses in Spanish, they can change the Center of Learning’s language by selecting Language in the top menu bar and then selecting Español. The Center of Learning’s language will change to Spanish. Using the Catalog or your Learning Paths, look for any course title and description that appears in Spanish. Those courses have been translated and are available in Spanish. Any course that still appears in English has not been translated.
New Course Announcements
You can receive an email notification when new courses are released. You will only receive notifications for courses that are relevant to you, based on the selected Person Type in your profile. To receive New Course email notifications, set “Send New Course Announcements” to Yes on your Profile Page.

Cancellation Policy
The Center of Learning has cancellation policies in place for hands-on courses, online instructor-led training sessions (V-ILTs), Virtual Classroom Training (VCTs), and other live events/training sessions.
The cancellation periods are:
- Hands-On Courses: 48 hours prior to the class start time
- Online Instructor-Led Training and VCTs: Managers can cancel systematically 48 hours prior to the class start. The Help Desk can assist in cancelling up to one hour prior to class start time.
To cancel your course enrollment, select Enrollment from the main menu and select View Your Schedule. A list of your current scheduled courses will be listed. Click the Cancel link for the course you want to cancel your enrollment for. A screen will appear asking you to confirm your cancellation, click Yes to complete the cancellation.
If a course is not cancelled within the cancellation period, your dealership will be charged a no show fee. The no show fees for courses are:
- Hands-On: $500
- V-ILT and VCT: $250
Blended Learning
Through its blended media approach (e.g., VCT, VOD, WBT, and V/P-ILT) along with highly qualified instructional design, GM STC helps to extend the service technician’s knowledge. The program also reduces the time that service technicians spend away from dealerships.
Virtual Classroom Training (VCT)
VCT courses bring classroom training directly to your computer. This delivery method improves instructor and participant interaction through a rich media interface and provides an enhanced learning experience for the technician.
Technicians select their desired course and hit Enroll.
Technicians can see a schedule of their course enrollments by viewing “My Enrollments” or “My VCT” on the home page.
Note: To find the Technician Guide (TG), formally called Participant Guides, for VCT you are enrolled in to go to the View Course page by selecting the course’s name. Find the TG on this page and download it before the start of your course per below.


Virtual Instructor-Led Training
V-ILT courses bring part of the hands-on training experience into your dealership. They are the first part in series of course components that once completed provide credit for hands-on training requirements that would traditionally require multiple days in the training center. To enroll, technicians follow the same procedure as VCTs. Find the desired course on the Center of Learning, and select Enroll.
Just like with VCTs, technicians can see a schedule of their course enrollments by viewing “My Enrollments” or “My VCTs” on the home page.
The Technician Guides for V-ILTs are also found the same ways as VCTs. Go to the View Course page for whatever course you wish to view the Participant Guide for and download it using the link found on that page.
Video On Demand
Many prerecorded STC courses are available through Video On Demand (VOD). Emerging Issues courses are released directly to VOD on the second Thursday of each month. Through the combined use of text, 2D and 3D animation, photos, and video, technicians are able to review these training modules on-demand any time of day or night, reducing time away from the service bay. VOD post tests are available directly from the VOD page upon completion of the course.
Web Based Training (WBT)
WBT is knowledge-based training delivered over the internet. Service technicians can access WBT at their convenience. To launch a WBT course component, technicians identify the course using the Catalog Search, Learning Path, or Path to 100% STS link and select Launch.
Center of Learning Reports
Various reports are accessible through the Center of Learning website. These reports help dealership managers determine their employees’ training needs and accomplishments.
- Dealer Certification Progress Report: shows the breakdown of certification course completion by dealership, job title, and employee
- Service Training Standards (STS) Report: GM STS shows percentage completion weekly by dealership
- (GM MD) Service Training Standards (STS) Report: GM Medium Duty Truck (GM MD) STS shows percentage complete weekly by dealership
- Course Completion Report: course completion summary and detail information
- Dealer Enrollment Summary (User & Course)
- Dealer Training Summary
- World Class Tech – Summary By Region
Master Technician Certification (MTC) Recommendations
The Center of Learning website recommends the next two full courses a service technician needs to complete to achieve MTC in a selected work area. A full course consists of all course components (WBT, online instructor-led, Hands-On). The system provides the additional recommendations to allow for long-term planning of training. For example, a service technician can complete the online instructor-led components of the next two courses and then enroll for the Hands-On course component as soon as prerequisites are satisfied.
Note: The system recommends MTC courses only for service technicians who have selected a Learning Path.
Service Training Standards (STS)
To start, the dealer service manager registers the dealer technicians into specific Learning Paths with the Center of Learning. These Learning paths have percentages that correspond to STS requirements and display their percentage of completion on the homepage. Once a technician is registered to a Learning Path, the Center of Learning website recommends the next two full courses a service technician needs to complete to achieve the dealership’s division-required training in each work area. A full course consists of all components of a course (WBT, online instructor-led, Hands-On). The system provides the additional recommendations to allow for long-term planning of training. For example, a service technician can complete the online instructor-led components of the next two courses, and then enroll for the Hands-On component as soon as prerequisites are satisfied. To meet STS, the system recommends the “best case” service technician, the one closest to fulfilling the training requirements in each work area. As soon as the dealership is 100% in a given work area, the system does not recommend additional training for that area, even though others may need additional training.
Note: The system recommends training only for employees who have specified a Learning Path.
GM Training Tips
Learning Path
The Learning Path is an online feature developed to help dealership managers and employees plan their training. The Learning Path outlines training plans, recommends courses, and summarizes training activity to promote achieving dealership training standards and obtaining individual certifications.
Service managers have the ability to quickly and easily build the Learning Paths for all of the service technicians at the dealership by selecting the following path: Profile > Profile Manager. When service managers click on this link, they get a list of all technicians at their dealer. From there, they can select View Learning Path > Add/Remove Learning Path to get to the page where they can add/remove learning paths for the Service Technical Certification Areas.
ILT Waitlist & Unscheduled ILT Course Request a Class Capability
If you want to enroll in a Hands-On class that is currently full, you can join the waitlist to be placed in a future class at the same training location. If there are openings for a class you want to take, but none of the times or locations work for you, you can utilize the Request Unscheduled Course function. By selecting the Request Unscheduled Course link, you can specify what course and where you want the potential offering to take place. These submissions are taken into account when the class organizers get ready to schedule a new offering.
Note: Certain ILT courses are only offered at the Regional Training Centers. Please check your learning path for any restrictions before requesting an unscheduled course.
Online Testing
The Center of Learning website provides users with the ability to take a variety of online tests. These service technical and Sales, Service, and Parts tests include online instructor-led seminar tests and Placement Assessment tests, which allow users to test out of classes. Upon completing the test, users receive immediate feedback on their score. The system immediately updates their training record.
Technician Guides (TGs) for VCTs and V-ILTs
VCT and V-ILT Technician Guides can be downloaded from the Center of Learning website from the View Course page. To download a guide, access the site and find the course, either through your Learning Paths or through the Catalog and select its name. This will bring you to the View Course page where you can download the Technician Guide.
The GM technical training centers have now gone paperless and will provide tablets and tablet friendly TGs for participants to annotate and mark up. Participants can then save their digital TGs to a flash drive and take it with them, with their notes, back to their dealership to reference later.
Training Expiration Email Notification
Before the expiration of a training event (ASE certifications, Certification Events), the Center of Learning website automatically sends an email notification to the employee (provided an email address has been entered into the system). This allows employees to ensure they stay compliant with any and all training requirements.
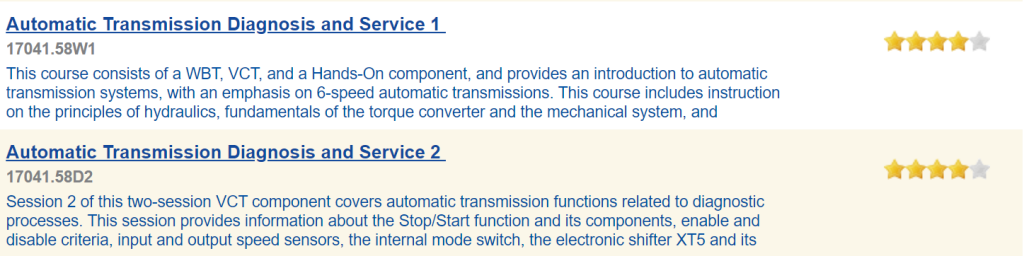
Smart Search Functionality
The Center of Learning website offers a smart search functionality that you can utilize to locate courses. The search engine uses course long names, short names, abstract, notes, and key words to try to find a match. You do not need to know a full course name or course number to utilize the Smart Search feature. Simply select the Catalog page of the Center of Learning and use the search bar to search partial numbers or names.
GM Global Connect and Center of Learning Profiles
GM Global Connect is the initial driver of data used to profile a dealer learner in Center of Learning. When a dealership’s Global Connect Partner Security Coordinator (PSC) generates a new GMIN and profile in Global Connect, a new Center of Learning profile is automatically created overnight or as soon as the learner clicks the Center of Learning link from Global Connect.
Activation, inactivation or edits of a profile in Global Connect transfer nightly to Center of Learning. If a profile in Global Connect is deactivated, the Center of Learning profile will also be made Inactive. Conversely, if a profile in Global Connect is reactivated, the corresponding Center of Learning profile will automatically be made active again the following day.
This means:
- Dealer employees MUST be active in Global Connect to appear in Center of Learning
- All dealer employee additions, deletions, inactivations and reactivations must be made in Global Connect. You can no longer create or inactivate a dealer profile in Center of Learning.
- All dealership personnel who have a Global Connect ID will have a Center of Learning ID and Profile. This may affect training completion percentages.
- The role(s) assigned to a new Global Connect profile (new GMIN) will determine the initial Center of Learning person type(s) and learning path(s).
After initial setup, the only Global Connect changes that will update a Center of Learning profile
are changes to email, phone or name.
After a Global Connect profile is created, changes such as person type or Manager role in Center of Learning are NOT saved. This means when a Global Connect profile is inactivated and then reactivated, the Manager will need to go back and make appropriate changes to the profile once it is visible in Center of Learning.
How to Verify Roles in Global Connect
The role or roles that are assigned to a user when his/her profile is created in Global Connect determine the learning paths that are assigned in Center of Learning. Learners are required to complete all training associated with each role you assign. Review the list below to understand which Global Connect roles correspond to Center of Learning person types.
For example, a New Vehicle Sales Manager role gets a Sales Manager – New learning path, but a Sales Function role receives a General Support learning path.
How Job Roles in GlobalConnect Map to Center of Learning
| GlobalConnect Role | Center of Learning Person Type |
| Billing Manager | Office Manager/Controller |
| Body Shop Manager | Body Shop Manager |
| Body Shop Technician | Body Technician |
| Business/Accounting Manager | Office Manager/Controller |
| Comptroller | Office Manager/Controller |
| Cust Care Specialist – Backup | Customer Experience Manager |
| Cust Care Specialist – Primary | Customer Experience Manager |
| Customer Relations Manager | Customer Experience Manager |
| Dealer | Dealer Operator/Executive Manager |
| Dealer Principal | Dealer Operator/Executive Manager |
| F&I Director | Business (F&I) Manager |
| F&I Manager | Business (F&I) Manager |
| Fleet Sales Consultant | Sales Consultant – Commercial |
| Fleet/Commercial Manager | Sales Manager – Commercial |
| General Manager | General Manager |
| General Office Support (Cashier) | General Support |
| General Sales Manager | General Manager |
| HR Manager | General Support |
| Internet Sales Manager | Digital Marketing Manager |
| Internet Sales Person | BDC Manager |
| Inventory Manager | General Support |
| Medium Duty Sales Manager | Sales Manager – Commercial |
| Medium Sales Coordinator | General Support |
| New Sales Consultant | Sales Consultant |
| New Vehicle Sales Manager | Sales Manager – New |
| Office Manager | Office Manager/Controller |
| Parts & Service Director | Parts & Service Director |
| Parts Counter Person | Parts Consultant |
| Parts Inventory Manager | Parts Consultant |
| Parts Manager | Parts Manager |
| Sales Functions | General Support |
| Sales Management | Sales Manager – New |
| Security Administration | General Support |
| Service Advisor | Service Consultant |
| Service Manager | Service Manager |
| Service Technician | Technician Apprentice |
| Systems Manager | General Support |
| Title Clerk | General Support |
| Used Vehicle Sales Consultant | General Support |
| Used Vehicle Sales Manager | Sales Manager – Used |
| Warranty Administrator | Warranty Admin |
| Wholesale Sales Person | Outside Parts Sales |
How to Set Up New Profiles in Global Connect
Only authorized users have access to the GC ADMIN tool within Global Connect. You must be a Partner Security Coordinator (PSC), Partner Security Administrator (PSA) or Partner Security Facilitator (PSF) to be granted access to GC ADMIN.
You can access the GC ADMIN tool from your Global Connect profile – click on the arrow next to your name and click the Administration Tools link to launch.
When a dealership PSC (Partner Security Coordinator) sets up an employee in Global Connect, that employee will be able to log in to Center of Learning right away; however, the PSC will not be able to make any changes to that profile until the following day. Depending on the Global Connect role selected, the employee may not yet see the desired learning path, and the Dealer Manager will not be able to make a change until the next morning.
New Global Connect users must log in to Global Connect with 48 hours of receiving their new ID, or the ID will be deactivated.
How to Create a User in Global Connect
From the Administration Tools menu, click Create User to begin.

All fields marked with a red asterisk indicates a mandatory field. Enter the employee contact information in the appropriate fields.
HELPFUL HINT: Special characters are not permitted in any of the Name values – this includes hyphens, apostrophes and accents. Only a SPACE is permitted in a valid entry.
A ? next to the field indicates a TOOL TIP – click on it for support on what is required for this field. For the User Name, the TOOL TIP identifies key requirements for a valid User Name entry.
When you enter in a First Name and a Last Name the User Name value is automatically generated as a UNIQUE entry. The unique ID that is generated may also be modified as required.
How to Lookup a GMIN in Global Connect
When creating a new GlobalConnect user, there are two options for the GMIN:
- User has a GMIN
- Do not know if user has a GMIN
The default value for GMIN is “User has a GMIN” – If the new user worked at a GM dealership elsewhere, it is very important to re-use the GMIN to retain all associated history with that person.
If the user is new to GM and/or you do not know their previous GMIN, you will select “Do not know if user has a GMIN.” If there is any possibility that the employee was issued a GMIN in the past, either at your dealership or somewhere else, or if he/she had a GMIN and does not know it, select the “Do not know” option.
The Search GMIN tool will open and allow you to enter employee information and search for an existing GMIN. It is important to identify existing GMINs before creating a new one to minimize the need to merge profiles and ensure course credit is attributed correctly.
Complete as much information that you have, to support your search.
REMEMBER a GMIN Search requires an EXACT match for the GMIN and the NAME. Variations in First and/or Last names may result in inaccurate results. Example: Try Matthew versus “Matt” or Robert versus “Bob”. You may also consider searching on a maiden name versus married name.
Values entered in First Name and Last Name fields are auto-populated into the GMIN Search
screen.
The Search results will appear beneath the search window, including the associated company name and user profile information – making it easier for you to identify the correct GMIN/User combination.
If multiple results are returned you can use the Filter Search field to focus or narrow your results. Once you validate you have the correct GMIN match click into the GMIN link to populate the Create User screen.
If you are unable to locate a previous GMIN or if the employee does not have one, leave the GMIN field blank and one will be auto-created for the new user during the First Time Login process.
Complete the remaining fields to complete the user creation.
The new user’s password will be automatically generated and sent to the email address specified in the Create User email field. Use the Manual Reset option in the Reset Password section if there is any difficulty with the user receiving the automatic email.
Click the NEXT button. You will be brought to the Edit User Role screen. Select the role(s) appropriate for the new user. Up to 6 roles are permitted. Once you have assigned all applicable roles, click the Next button to continue.
In the Edit App Access screen, review all assigned/defaulted apps & critical activities. Highly
confidential applications are marked with a red exclamation icon.

Click the Next button to continue. You will be taken to the Verify User Information screen – carefully review the User Information, Security Admin Roles, User Roles, Apps & critical activities assigned to the new user.
To make any changes, additions or edits, click the Back button.
To Cancel the New User creation at any time, click the Cancel button.
Once you have verified the information, click the Save button.
You will receive the following when your user has been successfully created.

Click the Home Page link the navigation menu to return to the GC ADMIN Home Page.
The new user will receive an automated email with a system generated temporary password.
The Manage User option allows you to edit any details of an existing user. From the list of
employees, use the Filter Search field to narrow or focus your search. You may also use the ascending and descending sort buttons in each column to organize your employee list.
You can refer to the Until Deactivation and Until Deletion fields to make sure users remain active.
The ability to manage a user profile and/or access is available through the Manage User screen. A user will remain active for 120 days after last log in. After the 120 days the user will be deactivated. A Deactivated user can be reactivated. Once a user is deactivated, they will stay in the deactivated status for 30 days. After the 30 days the user will be deleted from the system. A Deleted user CANNOT be reactivated and once deleted a new ID must be created for them.
Click on the User Name link to go to the Edit view or click the ellipsis beside the employee you wish to manage and choose the appropriate action.
To Edit a user, you can modify all fields except for User Name and GMIN.
- Click the Next button to continue to the Edit Roles screen.
- Review the Edit Roles screen and click the Next button to continue.
- At any time during the Edit process, you can click Cancel and return to originally saved user information.
- Like Create User and Fast Create User, you will be asked to verify and Save all changes made to the user.
To Deactivate a user:
- Click the ellipsis and select Deactivate (only PSA and PSC roles have this ability).
- From the Deactivate User screen, enter in all pertinent information to support the deactivation – all information you feel is relevant to the deactivation according to your business process.
- This process is NOT reversible.
IMPORTANT: With the increasing focus on security, performing this step immediately following
an employee termination is critical to the protection of dealer information.
Click the Deactivate button to complete.
You will receive the following upon successful completion:

How to Verify Person Types in Center of Learning
Person Types in Center of Learning are more specific and varied than the number of job roles in Global Connect. Dealer Managers should review Center of Learning profiles for team members and select a more specific Person Type, if necessary, to ensure they are assigned the most appropriate learning path.
To view user’s and make changes to their profile:
- Click Profiles from the menu options and then select Profile Manager.
- Type in criteria to locate the desired user and then click Submit.
- Click Edit Profile and scroll to the bottom third of the screen to review the assigned Person Types.
- Change or add Person Types by clicking the drop-down arrow and select the desired Person Type.
- Note: You can remove a Person Type by clicking the drop-down arrow and choosing the (SELECT ONE) option.
- Additional lines will appear after you add an additional Person Type; you can select up
to ten Person Types in Center of Learning. - Once you have completed making your selections, click Submit to save changes.
How to Edit Profiles in Center of Learning
To update a user’s profile in the Center of Learning:
- Click Profiles from the menu options and then select Profile Manager.
- Type in criteria to locate the desired user and then click Submit.
- Make changes to the settings of the profile you wish and then select Submit to save the changes
For more specific changes to users profiles, see below:
Update a Profile to a Manager Role in Center of Learning
To update a user’s profile in the Center of Learning to have Manager rights do the following:
- Click Profiles from the menu options and then select Profile Manager.
- Type in criteria to locate the desired user and then click Submit.
- Click Edit Profile and scroll to the Roles section
- Select the checkbox for Dealer Manager/DTA
- Click Submit to save changes
How to Transfer an Inactive User in Center of Learning (for Non-Global Connect Users)
If you need to transfer an inactive non-Global Connect user in Center of Learning, you can follow this process.
- Click Profiles from the menu options and then select Transfer Inactive Participant.
- Type in the Org Number and Participant ID being transferred and select Submit.
- Confirm your changes are correct and select Transfer
- Select the checkbox for Dealer Manager/DTA
- Click Submit to save changes
To transfer active users you must contact the Help Desk.
How to Deactivate a User in Center of Learning (for Non-Global Connect Users)
If a non-Global Connect user is no longer an active user in Center of Learning, you can follow this process to deactivate his or her profile.
- Click Profiles from the menu options and then select Profile Manager.
- Type in criteria to locate the desired user and then click Submit.
- Click Edit Profile and scroll to the Active User setting
- Select the No radio button
- Click Submit to save changes
How to Reset a User’s Password in Center of Learning (for Non-Global Connect Users)
Managers have the ability to reset their learners’ passwords should they forget it or if they believe their login information has been compromised.
This process is only for user profiles that are created and managed in Center of Learning. If a learner exists in Global Connect, do not use the process below. Global Connect user profiles are managed in Global Connect. Contact your dealership’s Global Connect administrator for help.
- Click on Profiles in the Center of Learning homepage menu and then select Profile Manager.
- Search for the learner whose password needs to be reset by any of the criteria listed.
- Once you have located the learner, click Edit Profile.
- Scroll down to the Password field and type in a temporary password.
- Retype the temporary password in the Confirm Password field.
- Click Submit at the bottom of the screen to save your changes.
How to Track Active Users in Global Connect
Generate Report
Let’s now focus on the remaining feature within GC ADMIN – Generate Report. This report allows a PSC to create a list of users associated to a specific APP category and for ONLY the restricted activities that are available within that category.
From the Report Name pick list, select Application Users Report.
Choose which App Category (Workbench Type) you want to generate a report for.
From the Restricted Activity pick list, choose which activity you want to review.
The report is generated and will show ALL users with access to the Restricted Activity you focused on.
IMPORTANT: Only Restricted Activities are available for this reporting feature – all other general APP access reports are currently not available.
Click the Print button to print a copy of the report.